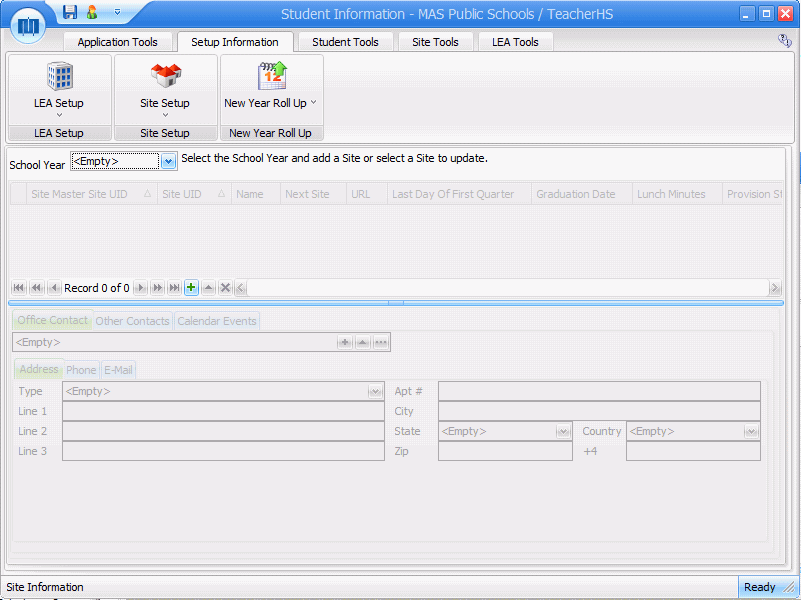
The Setup Site Screen is used to setup the valid sites for your school district for which you will maintain information in the system.
Note: Before continuing with the Setup Site Process, you must first enter the Site information in the LEA Setup Menu/Site Master.
From the i-SI Main Form, click the Setup Information Ribbon Page, Site Setup Menu, Site.
The following screen will be displayed:

Use the School Year Drop Down List Box to select the School Year.
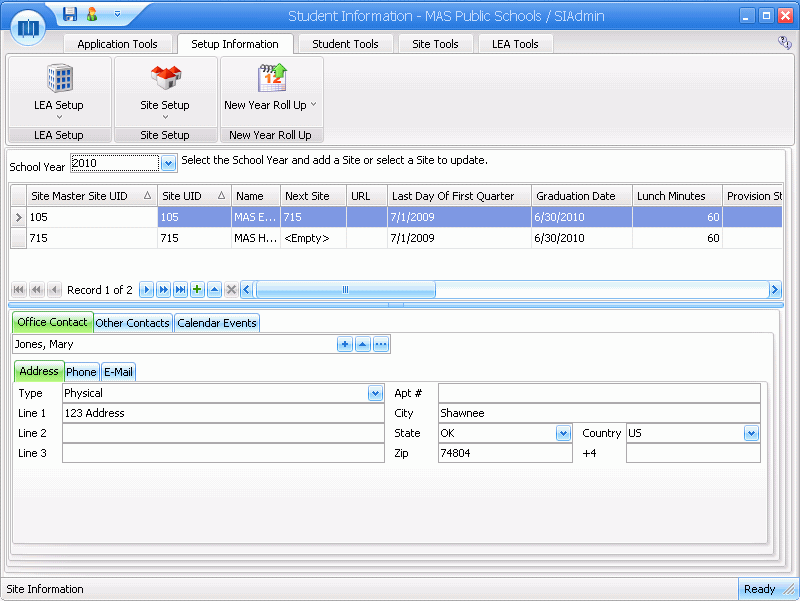
Click the ![]() Button.
Button.
The Site Years Detail Wizard will appear:
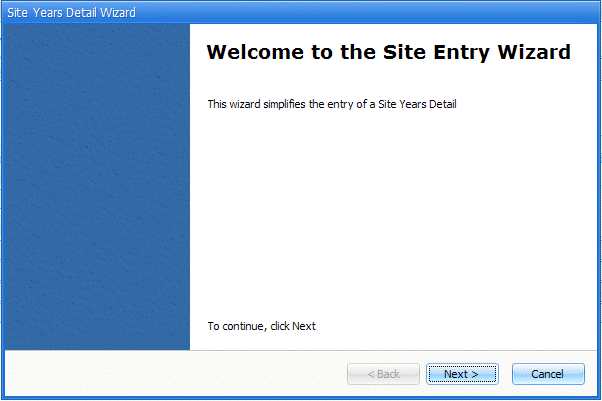
Click the ![]() Button.
Button.
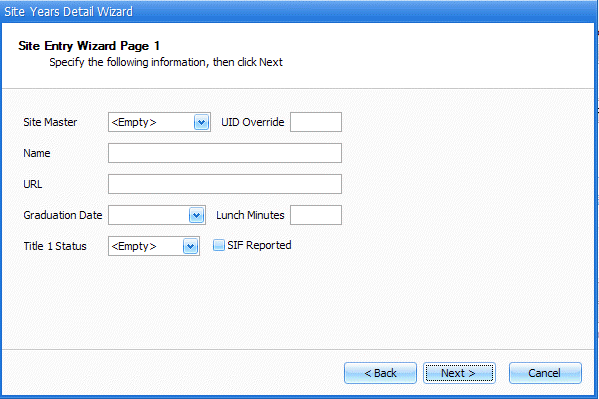
Click the links below to view the input specifications:
Site Master: Use the Drop Down List Box to select the Site Master.
Title 1 Status: Use the Drop Down List Box to enter the Site's Title 1 Status.
SIF Reported: This indicates if the Title 1 Status has been reported to SIF.
Click the ![]() Button.
Button.
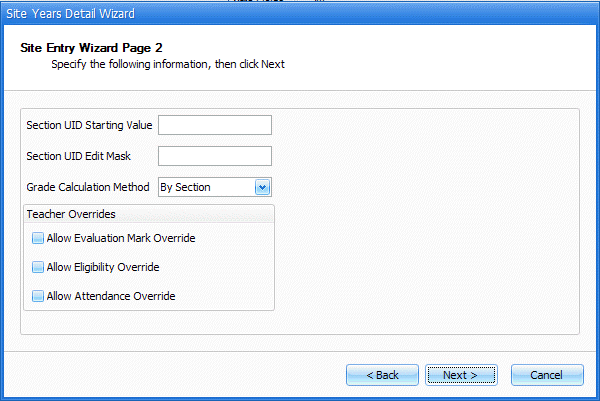
Click the links below to view the input specifications:
Grade Calculation Method: Use the Drop Down List Box to select the Calculation Method for this site. This indicates how the grades will be calculated in the i-GB Instructor Workspace. If By Section is selected, the instructors will be allowed to choose the Grade Calculation Method in their i-GBWorkspace. If any other selection is made, the grades for this site will be calculated accordingly. To view an example of each Grade Calculation Method, click here.
Teacher Overrides
Note: If these overrides are not selected, once the evaluation marks, eligibility and attendance have been recorded in the i-GB Instructor Workspace, the teacher will not be allowed to change. The change must be done by the administrator.
Allow Evaluation Mark Override: Select this option to allow the Instructor to override evaluation marks once he/she has recorded them in i-GB.
Allow Eligibility Override: Select this option to allow the Instructor to override eligibility once he/she has recorded it in i-GB.
Allow Attendance Override: Select this option to allow the Instructor to override attendance once he/she has recorded it in i-GB.
Click the ![]() Button.
Button.
Click the ![]() Button.
Button.
Next, you will need to enter the Site Contact Information.

Office Contact Tab
If the contact has been entered into the system before, use the
Person Finder to enter the contact's name. If they have not been entered
into the system, click the ![]() Button.
Button.
To add a new person, click the ![]() Button next to the Person Field.
Button next to the Person Field.
The New Person Form will appear:
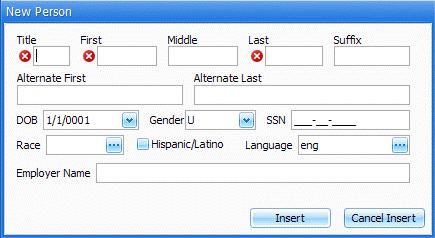
Input specifications are as follows:
Title: Enter the contact's title.
First: Enter the contact's first name.
Middle: Enter the contact's middle name.
Last: Enter the contact's last name.
Suffix: Enter the contact's suffix (I.e. Sr, Jr), if applicable.
Alternate First: Enter an alternate first name for the contact, if applicable.
Alternate Last: Enter an alternate last name for the contact, if applicable.
DOB: Use the Drop Down Calendar Box or enter the contact's date of birth.
Gender: Use the Drop Down List
Box to enter the contact's gender.
SSN: Enter the contact's social security number.
Race: Click the Lookup Button.
The following screen will appear:
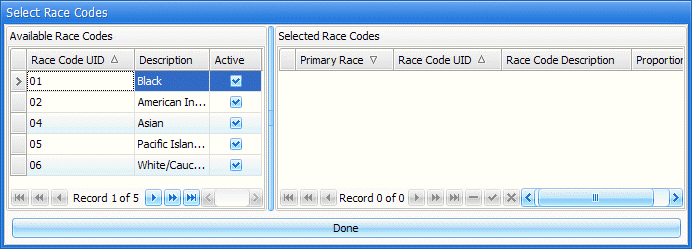
Click and drag the applicable Race Code(s) from the Available Race Codes Box to the Selected Race Codes Box. Note: The system will default the Primary Race Code to the first Race Code you drag over from the Available Race Codes Box to the Selected Race Codes Box.
Select the Hispanic/Latino Indicator Box if the contact is of Hispanic/Latino descent.
Language: Click the Lookup Box.
The following screen will appear:
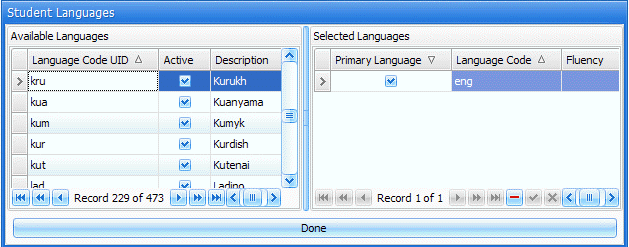
Click and drag the applicable Language(s) from the Available Languages Box to the Selected Languages Box. Note: The system defaults the primary Language to English. To change the primary Language from English, unselect the Check Box and select the Check Box for the correct Language.
Employer Name: Enter the name of the Employer.
Click the ![]() Button.
Button.
Click the links below to view the input specifications.
Address Tab
Phone Tab
Email Tab
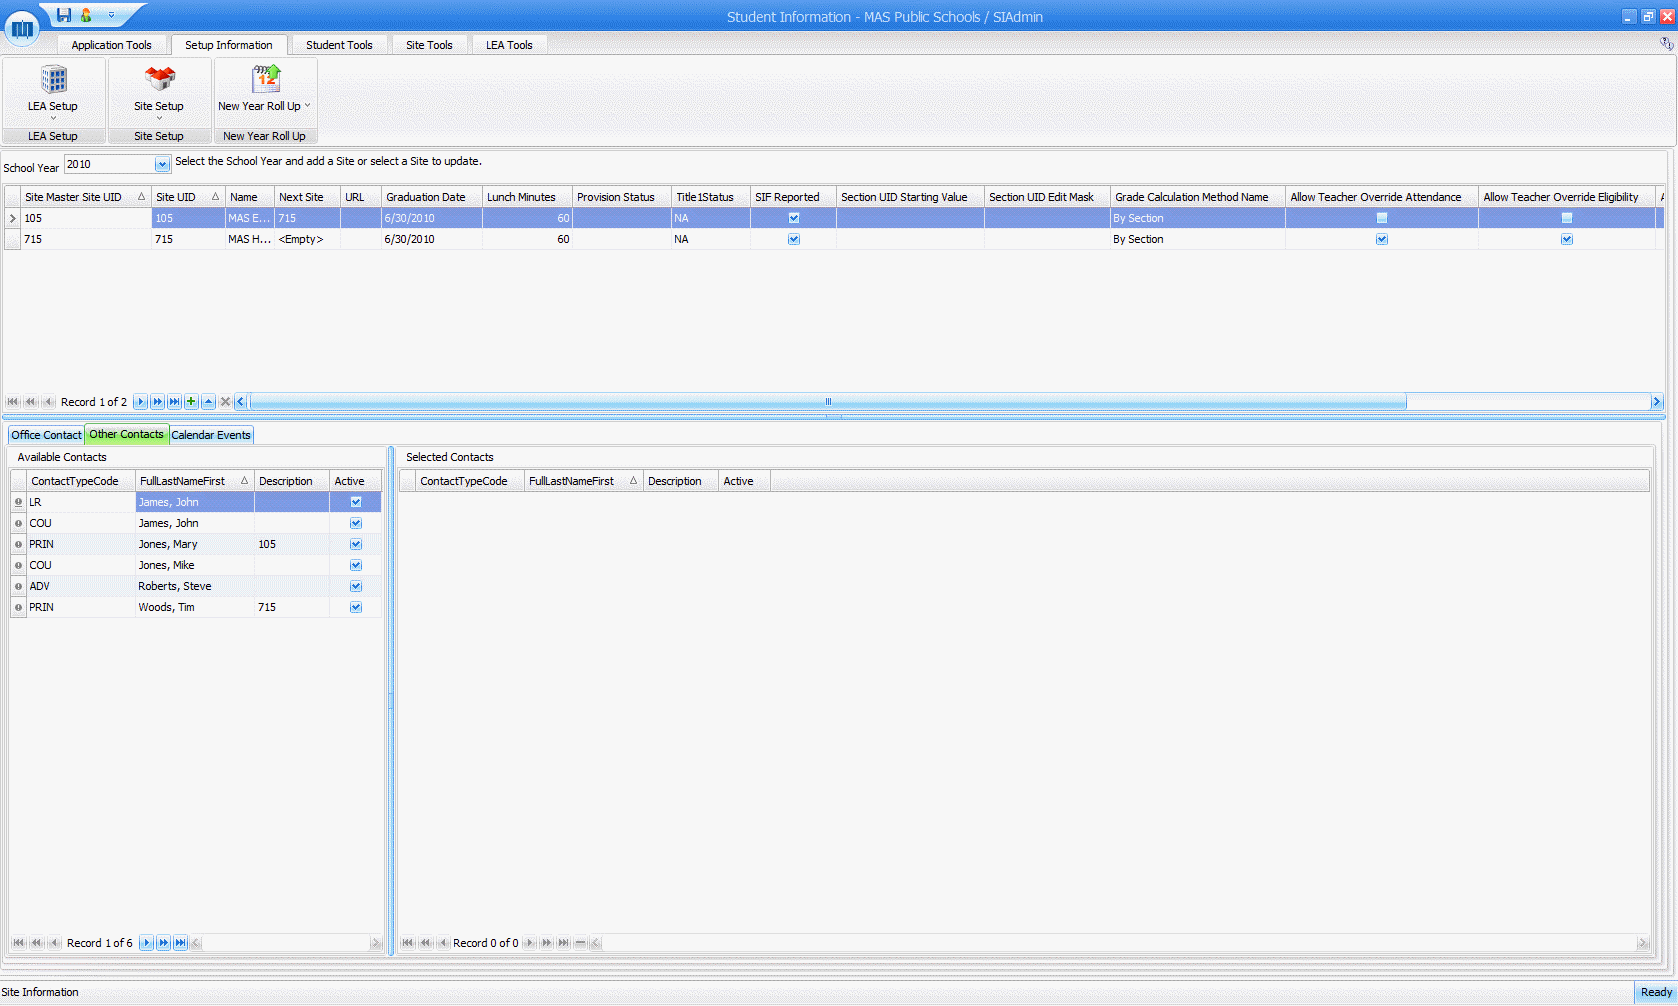
Note: The Contacts that display in the Available Contacts Grid have been populated by the system from LEA Setup/Contacts. Therefore, if a contact does not display in the Available Contacts Grid that you wish to add to the Available Contacts Grid, you must go through the Setup Contacts process in the LEA Menu.
The Contacts that have been setup in the LEA Group/Contacts Setup will display in the Available Contacts Grid. To associate the Contacts for the site selected, click and drag the Contacts from the Available Contacts Grid to the Selected Contacts Grid.
Click the ![]() Button.
Button.