 link. (Note:
Whenever you enable Two-Step Verification, you will be prompted to select
the method by which you want the system to send you a verification code
EACH time you login.)
link. (Note:
Whenever you enable Two-Step Verification, you will be prompted to select
the method by which you want the system to send you a verification code
EACH time you login.)Click the  link. (Note:
Whenever you enable Two-Step Verification, you will be prompted to select
the method by which you want the system to send you a verification code
EACH time you login.)
The following screen will appear:
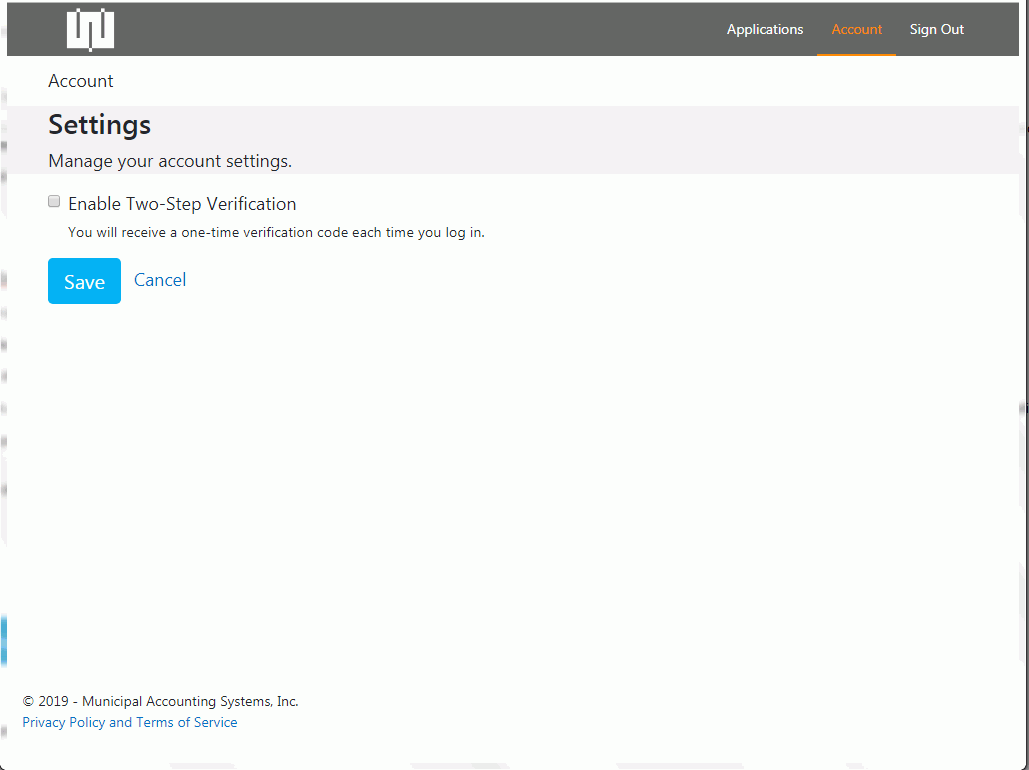
Check the Enable Two-Step Verification Check Box.
Click .
.
The Settings screen will appear. If you do NOT enter an alternate email, or a mobile phone number, the system will use your Recovery Email when sending a verification code each time you login.
You may add an alternate email AND/OR a mobile phone number in order to select which method you want to receive the verification code each time you login.
To add an alternate email and/or mobile phone, click the appropriate link
under the Two-Step Verification heading.

When you click the Add Email link, the following screen will appear:
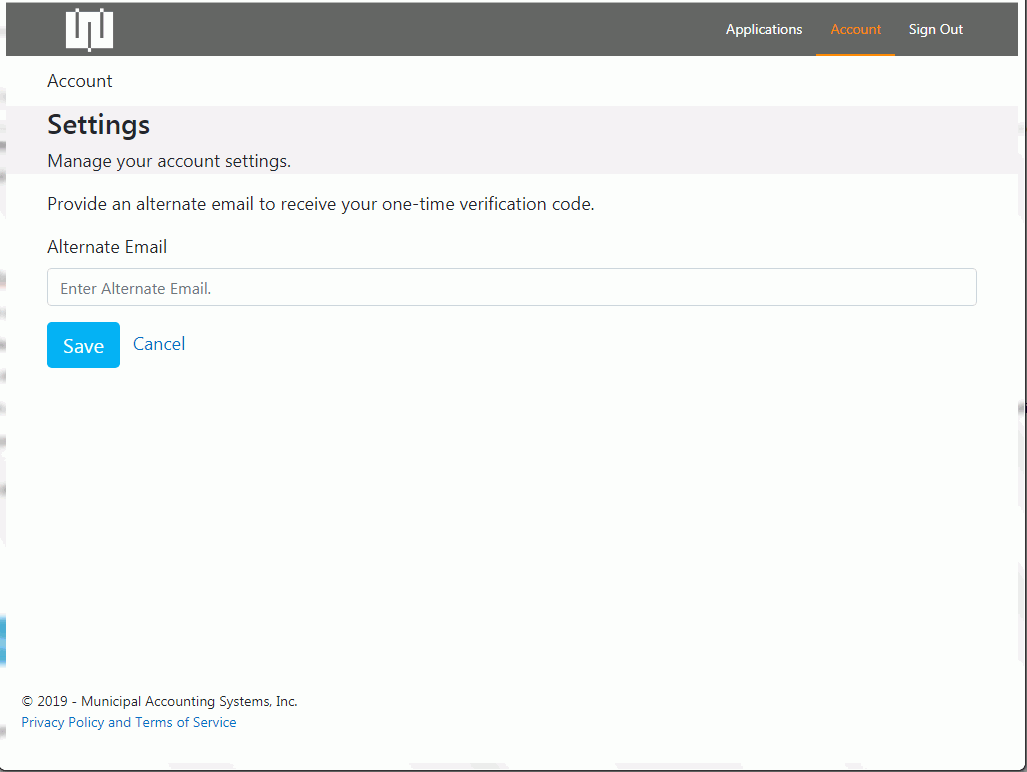
Enter the alternate email
address. Click  .
.
The verification code screen will appear:
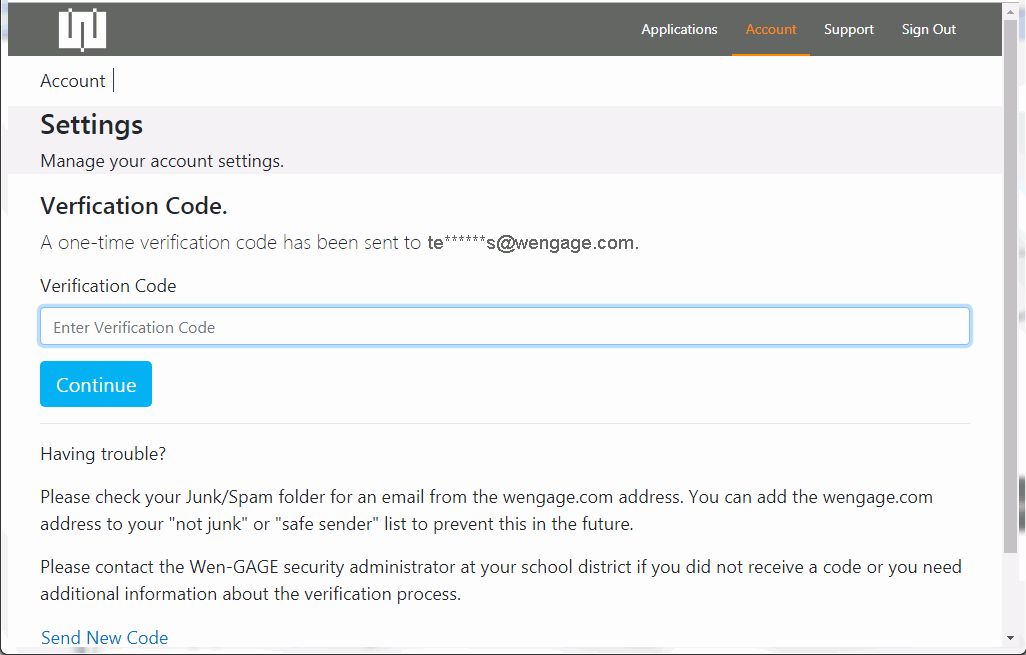
Enter the verification code that was sent to the alternate email address.
Click  .
.
You will be taken back to the Settings Screen.
When you click the Add Phone link, the following screen will appear:
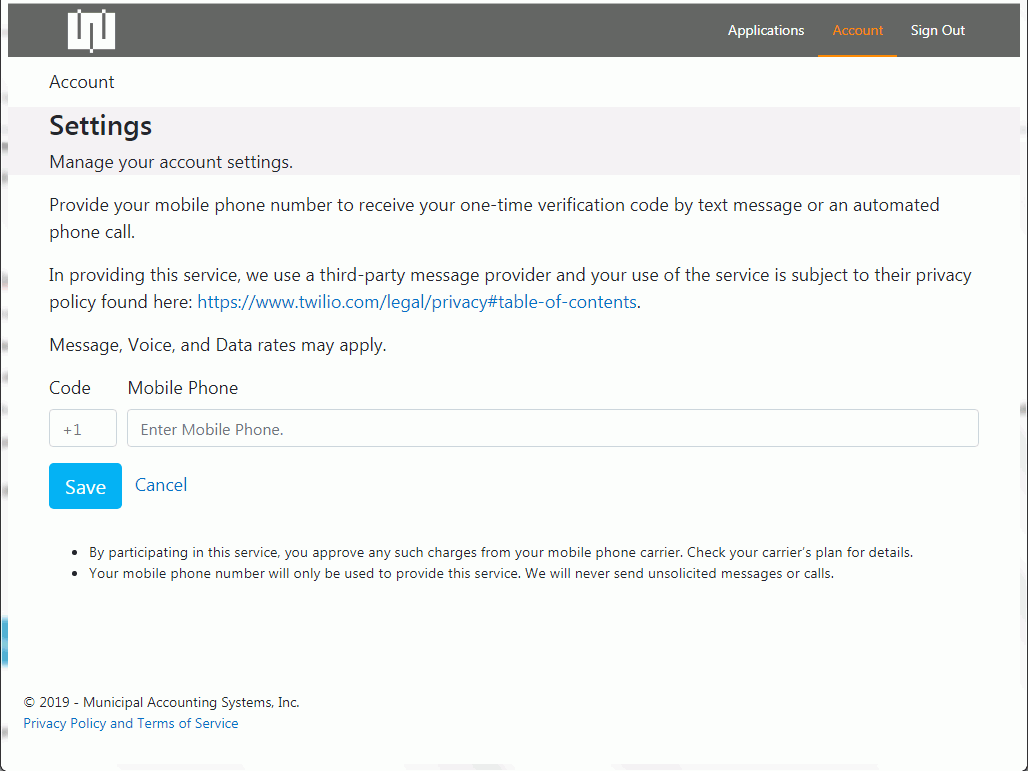
Enter the Mobile Phone number.
Click  .
.
The verification code screen will appear:
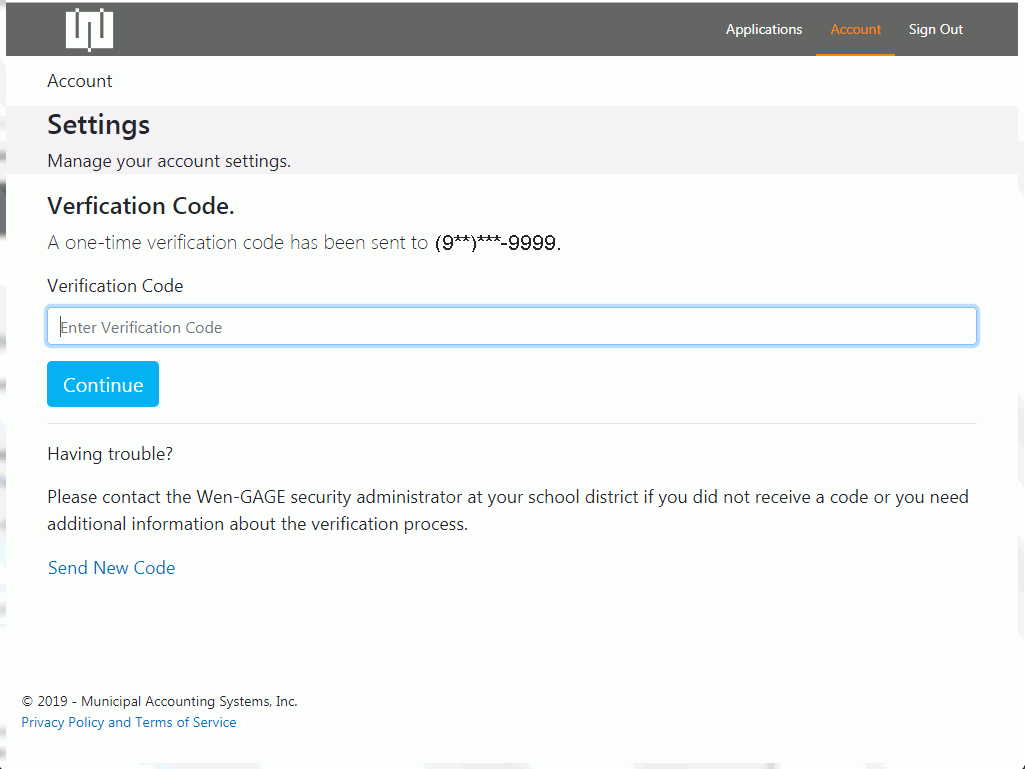
Enter the verification code that was sent to the mobile phone number.
Click  .
.
You will be taken back to the Settings Screen where the Two-Step Verification information will display.
From here, you can click the Applications Link in the top right corner of the screen to continue to the Application.
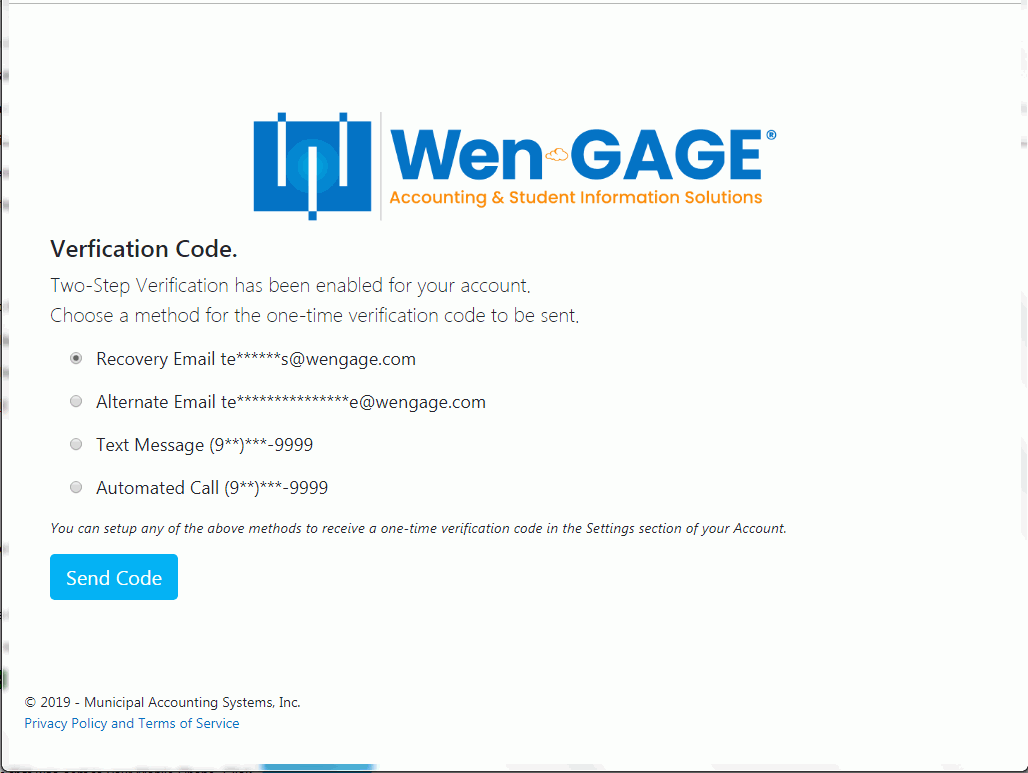
The screen will display (depending on how you have setup your Two-Step Verification) as below each time you login:
