
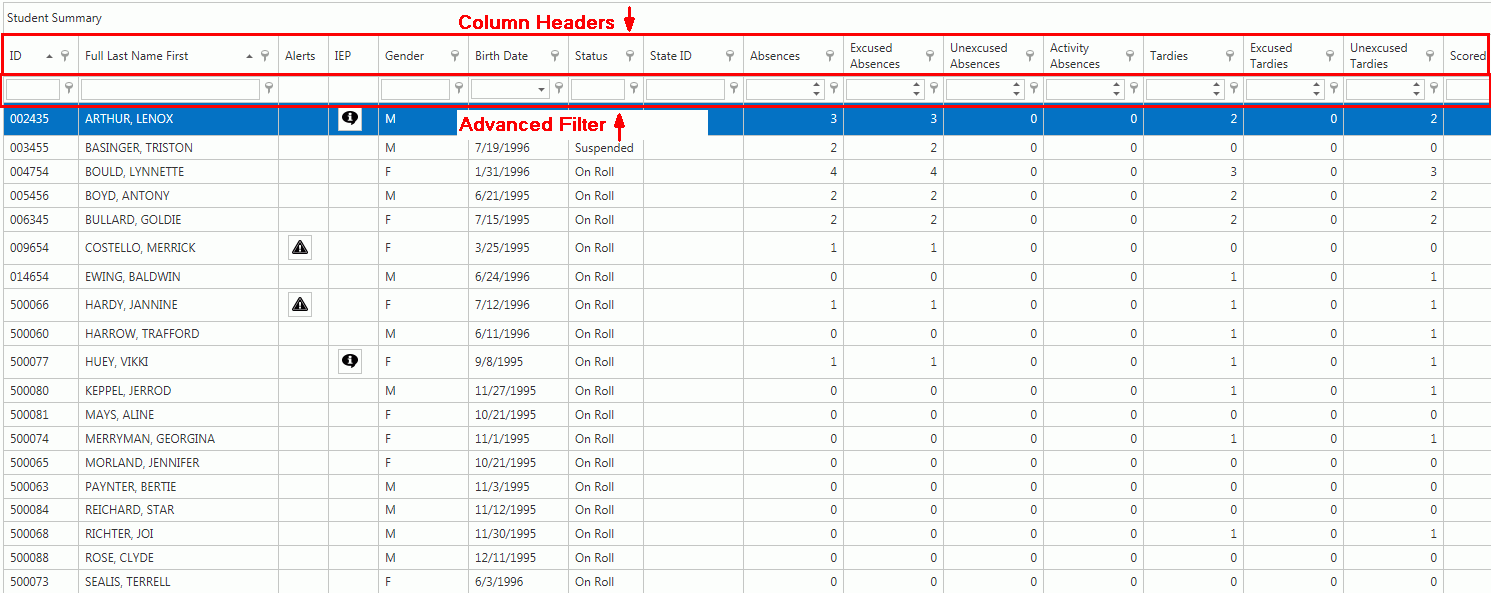
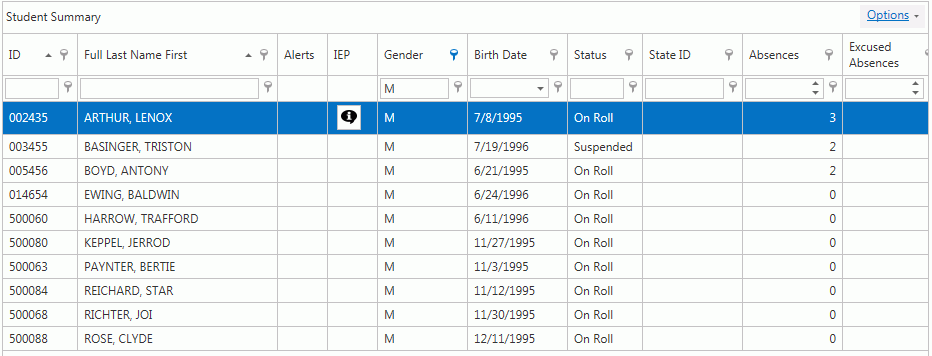
You can apply a filter to any grid in the i-GB Application. For this example, we will work in the Student Summary Grid.
There are 2 different ways to filter a column in a grid. You can filter by Column Header or you can filter using the Advanced Filter.
First, let's talk about how to filter for a specific student using the Advanced Filter.
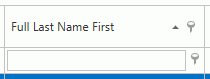
Click in the Full Last Name First Advanced Filter Field. Then, begin typing the Student's name and then press Enter on your keyboard.
The Student's Record will then appear in the grid:

Any time you have a filter applied in a
grid, the filter icon in the column header is blue. 
Also, the filter details display at the bottom of the grid.

To clear the filter, click ![]() next to the filter details.
next to the filter details.
Now let's filter for specific students using a Column Header.
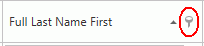
Click the Filter Icon in the Full Last Name First Column Header.
The Filter Criteria Box will appear.
There are two things to note about how you can locate Criteria in the Filter Criteria Box:
1. If the list that displays in the Filter Criteria box is short and your selection is visible, you can simply Check the Check Box next to the Criteria you want to display in the grid.
2. If the list is long and you need to locate your selection, then you can "search" for Criteria by entering that text into the 'Enter text to filter...' Box.

And then check the check box next to the students for whom you would like to display in the grid.
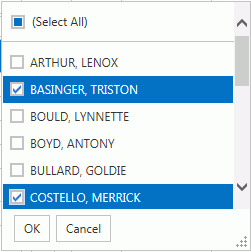
Click the OK Button.
Now the students for whom you filtered display in the grid.

Now let's say you would like to filter for students who have 2 or more absences.
First, click ![]() to the
filter.
to the
filter.
Click in the Absences Advanced Filter Field and enter 2.
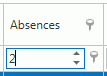
Press Enter on your keyboard, or click the Filter Icon to apply the condition.

Now we will filter for Males who have an A.
Click the Gender Filter Icon and select M.
Then, scroll over to the Mark Column. Click the Mark Filter Icon and select A.

These are the Male Students with an A.
You can also build a filter instead of applying a filter to multiple columns. (Remember to clear the filter before applying another.)
Click  next to the Student Summary Header.
Then, click  .
.
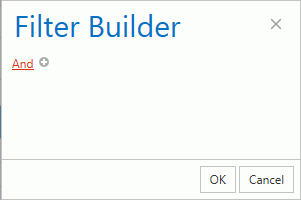
The Filter Builder Form will appear:
You can apply multiple Advanced Filters.
Click  .
.
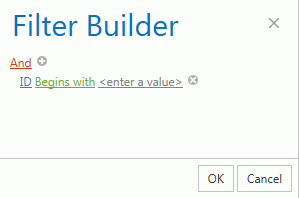
Click ID to enter one of the columns for which you want to filter.
Every Column in the grid will display in the list. Select the one for which you want to filter.
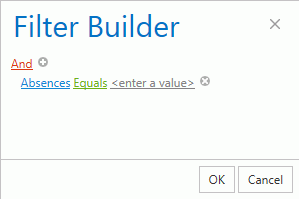
Click Equals in order to apply a condition for the filter. Select the condition for which you want to filter.
Click Enter a Value to enter a value for the condition you selected.
Enter the Value for which you want to filter.
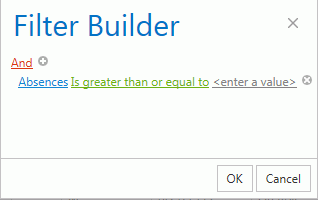
Click to add another
filter and then enter the conditions as in the previous steps.
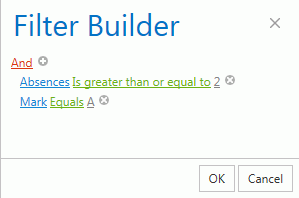
So, the grid will be filtered for students with 2 or more Absences with an A for the Session.

Lynnette Bould has more than 2 absences and an A for the Session.
This filter would be good to apply when determining Test Exemptions.